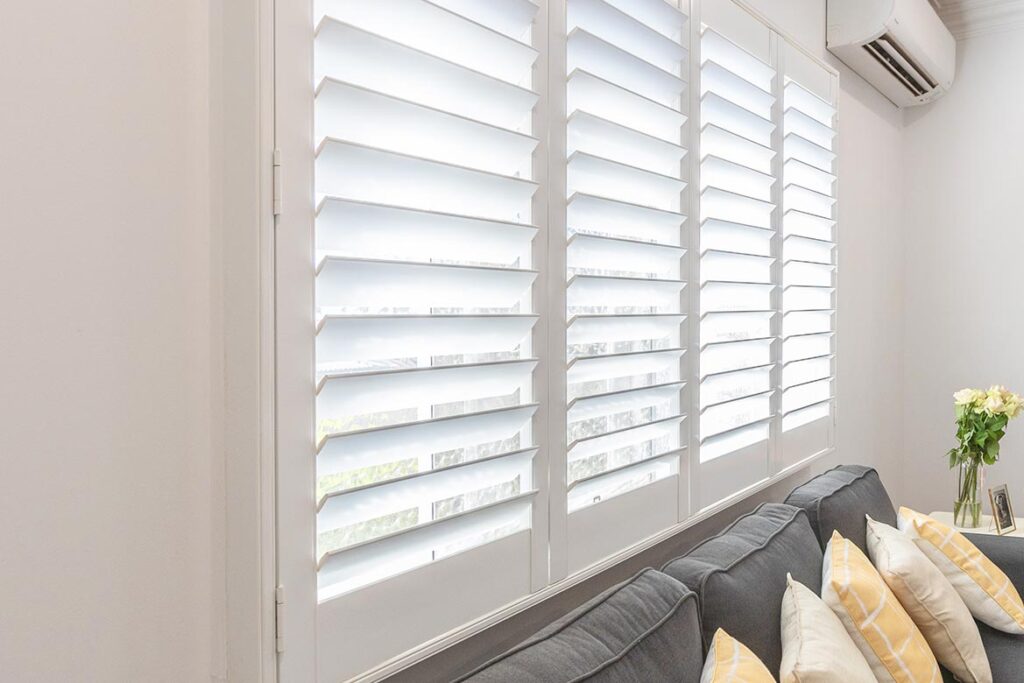
White plantation shutters are one of the most timeless and elegant window treatments you can choose for your home. They flood rooms with light, offer excellent privacy control, and lend a clean, classic look to nearly any interior style. But there’s one enemy that threatens their pristine appearance: yellowing.
If your once-bright shutters are starting to look more cream than crisp white, you’re not alone. Yellowing is the most common complaint among plantation shutter owners — and the good news is that it’s almost entirely preventable with the right habits and a little know-how.
The Problem
Why Do White Plantation Shutters Turn Yellow?
Before you can prevent yellowing, it’s important to understand what’s causing it. Shutters don’t turn yellow for a single reason — there are several culprits, and often multiple factors are at play simultaneously.
- ☀️ UV Light ExposureProlonged exposure to direct sunlight causes the polymers in PVC and certain paints to oxidize and break down, producing that characteristic yellow tint. South- and west-facing windows are especially vulnerable.
- 🔥 Heat BuildupShutters near heating vents, radiators, or in warm rooms experience accelerated polymer degradation. High temperatures speed up the very same chemical reactions that UV light triggers.
- 🍳 Cooking Grease & SmokeKitchen shutters are particularly at risk. Airborne grease particles and smoke residue settle on louvres over time, creating a yellowish film that attracts more grime.
- 🧴 Harsh Cleaning ProductsIronically, aggressive bleach-based or ammonia cleaners can accelerate yellowing by stripping protective coatings and causing chemical reactions with the shutter material.
- 💧 Moisture & HumidityBathrooms and laundry rooms expose shutters to steam and humidity. Moisture can cause paint to bubble or stain, contributing to discolouration over time.
- 🐾 Oils from Hands & PetsNatural oils from hands — and your pets! — transfer onto louvres with every touch and tilt. Over time, these oils oxidize and leave yellowing marks.
Prevention is infinitely easier than restoration. A few minutes of care each week will keep your shutters looking showroom-fresh for decades.
Interior Maintenance Fundamentals
The Solution
10 Tips to Keep Your Shutters Brilliantly White
Whether you’ve just installed brand-new shutters or want to preserve those you already have, these evidence-backed tips will dramatically slow — and in many cases completely prevent — yellowing.
1
Dust Weekly, Don’t Wait
Use a microfibre cloth or a dedicated shutter-cleaning tool to dust louvres every week. Dust accumulation creates a surface that traps pollutants and accelerates oxidation. Little and often beats deep cleaning once a year.
2
Use UV-Protective Window Film
Apply a clear, low-reflectivity UV film to your window glass. This can block up to 99% of UV rays from reaching your shutters while still allowing natural light into the room — the single most impactful thing you can do for shutter longevity.
3
Choose the Right Cleaner
Stick to a mild solution of warm water and a few drops of dish soap. This gentle formula removes grime without damaging coatings. Avoid bleach, ammonia, or multi-surface sprays that contain solvents.
4
Ventilate Kitchen Areas Well
Always use your range hood or exhaust fan when cooking. This dramatically reduces the amount of grease-laden air that reaches your kitchen shutters. Consider a grease-resistant coating if your kitchen shutters are close to the hob.
5
Tilt Louvres Strategically
During the sunniest parts of the day, tilt louvres so that direct sunlight hits the edges rather than the face of each slat. This simple angle adjustment dramatically reduces UV exposure on the most visible surfaces.
6
Apply a UV-Resistant Clear Coat
For PVC or composite shutters, a UV-resistant clear lacquer (available at hardware stores) provides an added protective layer against both sunlight and household pollutants. Reapply every 2–3 years.
7
Keep Heat Sources Away
If possible, redirect heating vents so warm air doesn’t blow directly onto shutters. If your shutters are near a radiator, use a simple radiator cover or shelf to deflect heat upward and away from the louvres.
8
Dry Thoroughly After Cleaning
After any wet cleaning, wipe each slat dry with a clean cloth immediately. Letting water evaporate naturally can leave mineral deposits and, in humid rooms, contribute to moisture-related staining.
9
Use a Shutter Sealer on Wood Shutters
Real wood plantation shutters benefit enormously from a quality sealer or wax polish applied annually. This protects the grain, seals out moisture, and keeps the paint layer intact and less prone to oxidation.
10
Schedule a Deep Clean Twice a Year
Set a twice-yearly reminder to deep clean your shutters: remove each panel if possible, clean with your mild soap solution, inspect for early signs of yellowing, and treat any affected areas before they worsen.
⚠️
Products to Avoid Completely
Never use bleach, ammonia-based cleaners, acetone, turpentine, or abrasive scrubbing pads on your shutters. These products can permanently damage the surface coating, remove paint, and ironically cause faster yellowing by exposing bare polymer material to the elements.

You can read more of this thru this link https://diyeasyfitshutters.com.au/plantation-shutters/durable-plantation-shutters/
Step by Step
The Correct Way to Clean White Plantation Shutters
Even with the best prevention habits, your shutters will need regular cleaning to stay pristine. Here’s a foolproof routine that’s safe for all shutter types.
- 01 Gather your suppliesYou’ll need two microfibre cloths (one damp, one dry), a bucket of warm water with a small squeeze of mild dish soap, and a soft-bristle paintbrush or shutter-cleaning brush for getting into tight angles.
- 02 Dust first — alwaysClose the louvres flat and use your dry cloth or brush to remove loose dust from top to bottom. Flip the louvres and repeat on the other side. This prevents wet cleaning from turning dust into muddy streaks.
- 03 Wipe with your damp clothWring your cloth so it’s barely damp — not dripping. Wipe each louvre from left to right in a single, firm stroke. Rinse your cloth frequently to avoid redistributing grime. Pay extra attention to the tilt rod and frame.
- 04 Dry immediatelyFollow immediately with a clean, dry microfibre cloth. Don’t let moisture sit, especially on wood shutters or around any painted surfaces. Buff gently — you’ll often notice the white brightening noticeably at this stage.
- 05 Inspect in good lightOnce dry, open your shutters and inspect them in natural light at a low angle. This reveals any areas with residual discolouration or early yellowing that need attention before they set in.
- 06 Treat any early yellowing spotsFor light yellowing, a paste of baking soda and water (applied gently with a soft cloth, then rinsed) can help restore whiteness without damaging the surface. For significant yellowing, consult a specialist or consider a professional re-painting.
Quick Reference
What’s Safe — and What to Avoid
Not all cleaning products are created equal. Here’s a quick guide to help you choose the right products for your shutters.
| Product / Method | Shutter Type | Safety | Notes |
|---|---|---|---|
| Warm water + dish soap | All types | Safe | Go-to everyday cleaning solution |
| White vinegar (diluted) | PVC / Composite | Safe | Good for mineral deposits; avoid on wood |
| Baking soda paste | PVC / Composite | Safe | Gentle whitening for light yellowing |
| Wood-specific cleaner | Real wood only | Safe | Protects grain; use as directed |
| Magic Eraser / melamine sponge | PVC only | Caution | Mildly abrasive; test first; avoid on paint |
| Bleach-based sprays | All types | Avoid | Strips coatings; accelerates yellowing |
| Ammonia cleaners | All types | Avoid | Causes polymer degradation over time |
| Acetone / nail polish remover | All types | Avoid | Permanently damages finish and paint |
| Steam cleaning | Wood shutters | Avoid | Warps wood; can cause paint bubbling |
Year-Round Care
A Seasonal Maintenance Calendar
Different seasons bring different threats to your shutters. Here’s how to adjust your care routine throughout the year to stay ahead of yellowing.
🌱 Spring
- Full deep clean after winter
- Inspect for moisture damage
- Reapply UV-protective coating if due
- Check and tighten any loose hinges
☀️ Summer
- Tilt louvres to reduce UV exposure
- Increase dusting frequency
- Check window films for wear
- Monitor south-facing shutters weekly
🍂 Autumn
- Deep clean before heating season
- Redirect heating vents as needed
- Apply wood sealer before cold months
- Inspect for any summer yellowing
❄️ Winter
- Wipe condensation from frames daily
- Keep heat sources deflected away
- Dust weekly despite less use
- Avoid steam from cooking nearby
Know Your Limits
When to Call in a Professional
DIY maintenance goes a long way, but some situations call for professional help. Consider bringing in a specialist if:
Your shutters show deep, pervasive yellowing that home methods haven’t resolved — this often indicates UV damage at the polymer level that requires professional re-coating or repainting. Similarly, if you notice warping, cracking, or paint peeling, these are structural issues where a professional assessment can determine whether repair or replacement is the wiser investment.
Plantation shutter specialists can also perform a factory-matched repaint that, when done correctly, can restore shutters to a condition that’s virtually indistinguishable from new — often far more cost-effective than full replacement.
💡
Pro Tip: Invest in Quality from the Start
When purchasing new shutters, always ask about the UV inhibitor content in the finish and request a sample that’s been UV-tested. Higher-quality shutters with superior coatings will resist yellowing significantly longer than budget alternatives — making them a better long-term value.
Smart Choice
DIY EasyFit Shutters: Built to Stay White Longer
If you’re in the market for new plantation shutters — or replacing ones that have yellowed beyond saving — DIY EasyFit shutters are worth serious consideration. Designed specifically for the home installer, they combine the classic look of traditional plantation shutters with materials and finishes engineered to resist yellowing from the start.
✦ Featured Option
What Are DIY EasyFit Shutters?
EasyFit plantation shutters are pre-finished, ready-to-hang shutter panels designed for straightforward self-installation — no specialist tools or trade skills required. They arrive cut to size, finished in a durable UV-stabilised white coating, and come with all the hardware you need to mount them in a standard window recess or on a face frame.
Why EasyFit Shutters Are Naturally More Resistant to Yellowing
Not all shutters are created equal when it comes to colour retention. EasyFit shutters have several built-in advantages over cheaper alternatives:
🛡️
UV-Stabilised PVC Core
Made from high-grade PVC with UV stabilisers blended directly into the material — not just applied to the surface — meaning protection doesn’t wear off with cleaning.
🎨
Factory-Applied White Finish
The white coating is applied under controlled factory conditions, ensuring an even, consistent layer that’s far more resistant to peeling and discolouration than field-applied paint.
💧
Moisture-Resistant Construction
Unlike solid wood shutters, EasyFit’s composite core won’t warp, crack, or absorb moisture — eliminating a key driver of paint bubbling and surface staining.
🧹
Smooth, Easy-Clean Surface
The louvre surface is engineered to repel dust and grease rather than absorb them — so your weekly wipe-down is faster, and grime buildup (a major cause of yellowing) is dramatically reduced.
🌡️
Heat-Stable Materials
EasyFit shutters tolerate the temperature fluctuations of UK and European homes without the polymer degradation that causes budget PVC shutters to yellow prematurely near radiators or sunny windows.
⚙️
No Raw Edges or Gaps
Pre-finished panels mean there are no bare, uncoated surfaces left exposed during installation — every face, edge, and corner arrives protected, leaving no weak points for yellowing to begin.
🔧 How to Install DIY EasyFit Shutters (Overview)
- Measure your window recess — width, height, and depth. EasyFit shutters are typically available in a wide range of standard sizes, or made-to-measure. Accurate measuring is the single most important step.
- Order your panels — select your louvre size (64mm or 89mm are the most popular), panel configuration (full height, café style, or tier-on-tier), and confirm the white finish option.
- Fix the frame or L-frame — attach the supplied frame to the window recess using the included screws and fixings. A spirit level is your best friend here. Most installs need only a drill and screwdriver.
- Hang the shutter panels — clip or hinge the panels into place on the frame. EasyFit’s click-and-hang system means most panels are secured in minutes without specialist knowledge.
- Adjust the louvres — test that all louvres tilt smoothly and the tilt rod operates correctly. Make any minor adjustments to hinge tension if needed.
- Apply an initial UV-protective spray — even though EasyFit shutters come with a UV-stable finish, applying a clear UV-protective spray after installation adds a second layer of defence, especially for south-facing windows.
Specific Care Tips for EasyFit PVC Shutters
Because EasyFit shutters use a PVC composite construction, a few care rules differ slightly from solid wood shutters. Keep these in mind:
✅
Use diluted white vinegarSafe on PVC; excellent for removing hard water marks and light discolouration. Dilute 1:4 with water.
✅
Microfibre is your friendThe smooth PVC surface responds perfectly to microfibre — it lifts and traps dust without scratching the finish.
✅
Wipe dry immediatelyPVC doesn’t absorb water but standing moisture can leave calcium deposits. Always follow up a damp cloth with a dry one.
✅
Use baking soda for spot yellowingA gentle paste on any early yellow spots lifts surface oxidation without damaging the UV coating underneath.
🚫
Avoid oil-based polishesWood polishes and oil-based products leave a residue on PVC that attracts dust and can cause surface yellowing over time.
🚫
Skip the steam cleanerWhile EasyFit panels are moisture-resistant, high-pressure steam can force water into hinge joints and affect the panel structure.
🚫
No solvent-based cleanersAcetone, turpentine, or strong degreasers will cloud and damage the surface coating — even on high-quality PVC panels.
💡
Annual UV spray refreshOnce a year, apply a light coat of UV-protective spray (car detailing products work well) to extend the life of the factory finish.
🏆
The EasyFit Advantage in Summary
For homeowners who want the look of bespoke plantation shutters without the professional installation cost — and who want a product that holds its white finish for years — DIY EasyFit shutters represent outstanding value. Their UV-stabilised, moisture-resistant construction means you’re starting from a far better position than lower-grade alternatives, and the straightforward installation means you can have them fitted and looking immaculate in a single afternoon.
Final Thoughts
The Takeaway: A Little Care Goes a Long Way
White plantation shutters are a beautiful and lasting investment in your home. With consistent, simple care — weekly dusting, the right cleaning solution, UV protection, and mindful placement away from direct heat — you can expect them to stay brilliant white for 10, 20, or even 30+ years.
The key is to treat prevention as a routine rather than a reaction. Don’t wait until your shutters are noticeably yellow to take action. And if you’re starting fresh, choosing quality from the outset — like DIY EasyFit shutters with their UV-stabilised finish and moisture-resistant construction — gives you a significant head start. Start good habits now, and you’ll be rewarded with shutters that look as pristine as the day they were installed, adding lasting beauty and value to your home.
Shutter & Home
Expert guidance for beautiful interiors
© 2025 Shutter & Home Blog · All tips for informational purposes only.