Tips:
Follow Instructions: Always refer to the specific instructions provided with your shutter kit for best results.
Safety: Use appropriate safety gear when cutting or drilling, and handle materials with care.
Precision: Measure twice, cut once. Accuracy is key to a professional-looking finish.
By following these steps and tips, you should be able to successfully assemble and install your DIY Easyfit window shutters. Reach out to us via email (with photos) should you need any assistance installing your shutters.
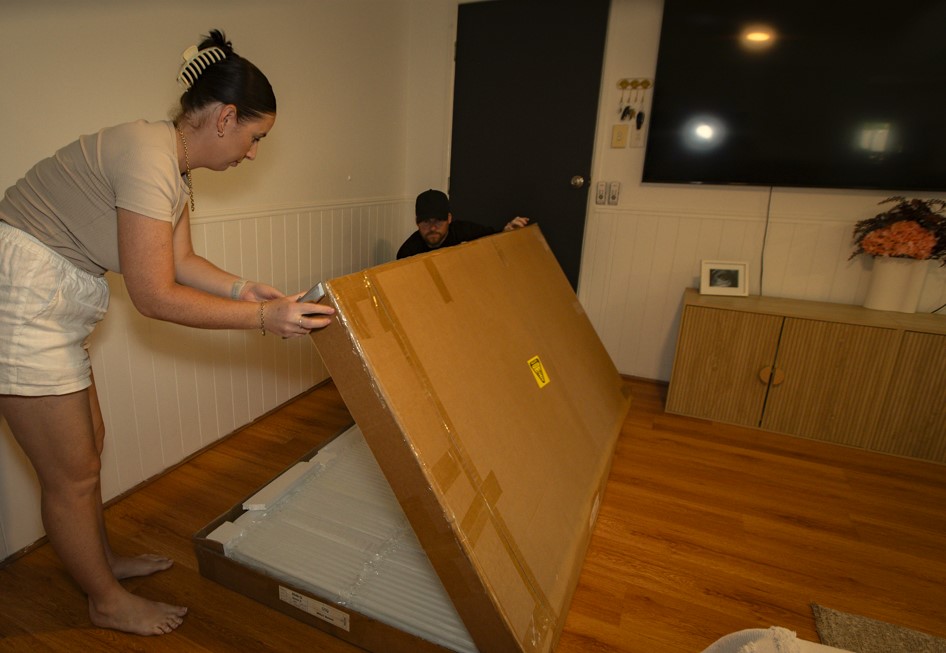
What you will receive:
– Windows with more than one panel, the panels and the frames will be boxed separately. The panels will be in large rectangular boxes and the frames in long boxes. The hardware will be included in one of these boxes indicated with a piece of red sticky tape at the end of the box.
– Windows with a single panel will be boxed complete with frames attached and assembled.

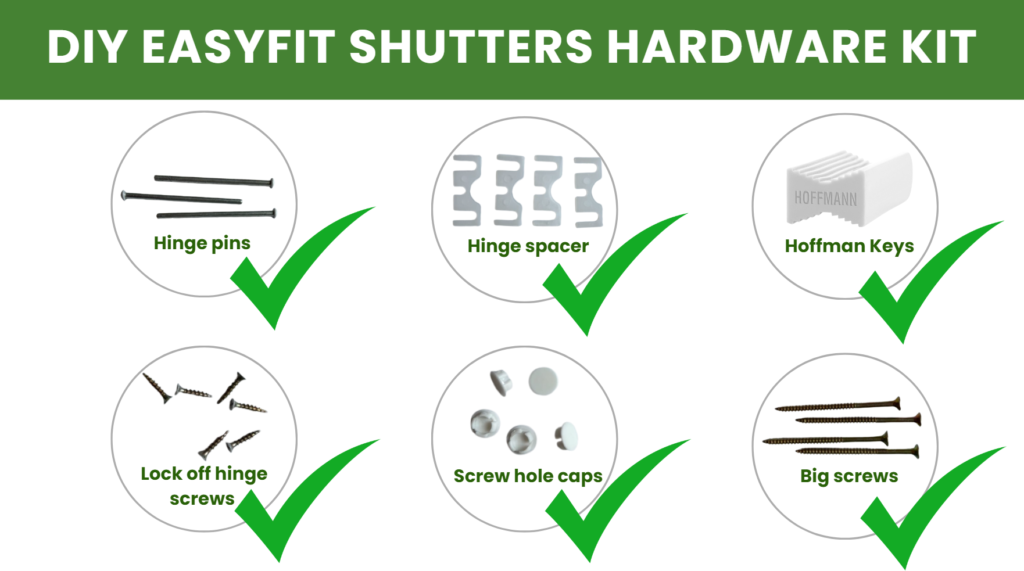
Your DIY EasyFit Shutters hardware kit will include:
1. Hinge pins
– Long pins used to connect adjoining hinge sides.
2. Hinge spacer
– Flat plastic spacers to help with aligning panels if needed Not required for installation, but helpful to keep on hand.
3. Screw hole caps
– Use these to cover the holes where you have drilled into your frame.
4. Lock off hinge screws
– Also known as hinge security screws or tamper-resistant screws, are used to secure hinges in place and prevent unauthorized removal or tampering.
5. Big screws
– For mounting your frame.
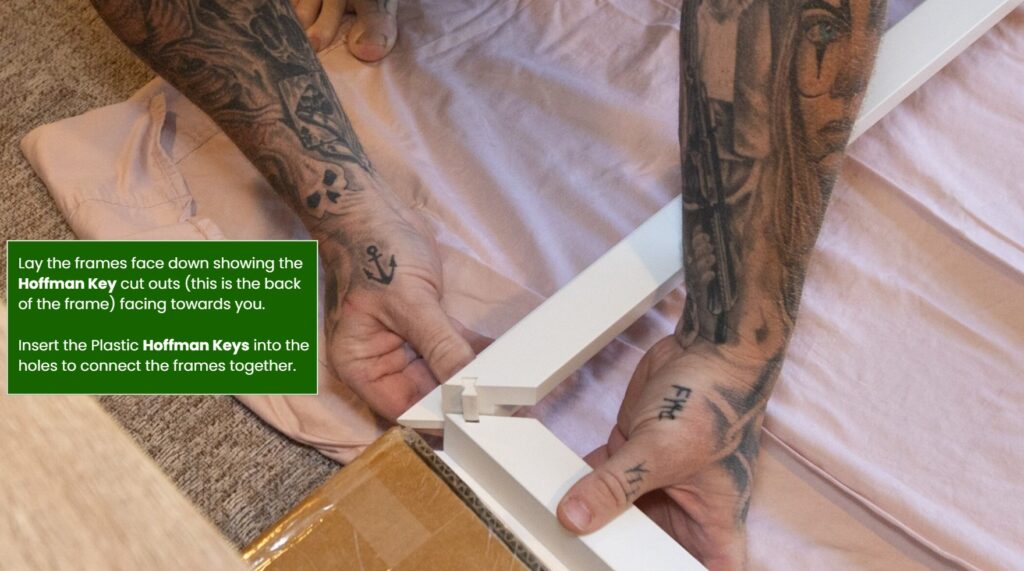
6. Hoffman Keys
– The bowtie shaped pieces that connect your frame corner together for mounting your frame.
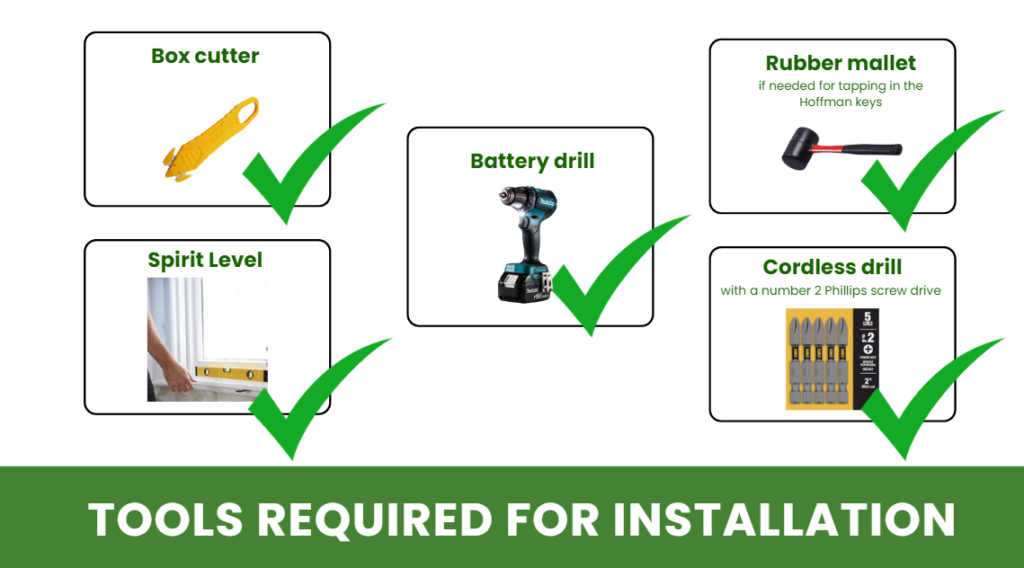
Tools required for installation:
HOW TO INSTALL YOUR
DIY PLANTATION SHUTTERS?
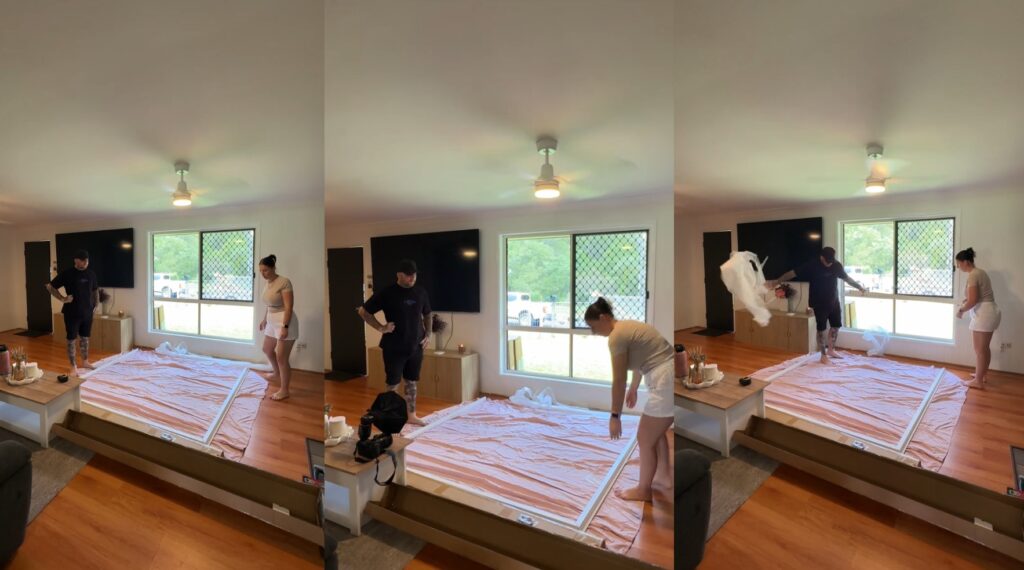
Step 1: Prepare Your Workspace
Choose a flat and spacious area to work in. Lay down a protective covering to prevent damage to your shutters or workspace surface.
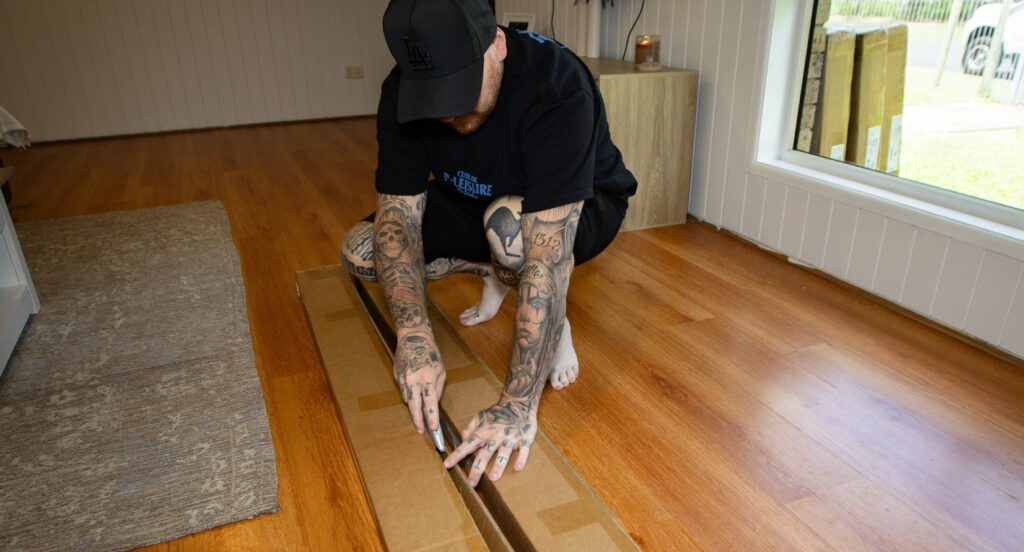
Step 2: Assemble the frame
Ensure the cover strips are removed from the frame and place the frame sides front face down on the floor. Each frame side is marked on the mitered end with a letter to indicate which frame side it is:
Step 3: Mount the Shutters
Positioning: To start, use your spirit level on the bottom window sill, and then to the left and right of the window reveal. This will give you an indication that window frame is reasonably square. Place the frame into the window reveal.

")
Installing: Your frames will already be pre-drilled from the factory. For best adjustment and alignment of the shutter frame, screw the Top, Left and Right sides of the frames making sure that the Top frame is hard up against the top window reveal. Using the spirit level to check that the side frames are straight then screw the side frames at the bottom. Once you feel that the shutter frame is square, it is time to install the panels.

Step 4: Now, you are ready to hang your shutter panels
Placing your panels into position within the shutter frame, align the hinges that are already attached to your frame and panels together, then place the hinge pins into the hinges. Repeat until all panels are attached. Ensure the shutters swing freely and align properly with the shutter frame. Use the hinge packers to make adjustments if the panel(s) within the frame does not appear to be square or aligned.


When you are happy with your panel alignment, insert the small hinge screw into the round hole on the hinge to lock them in position.


Step 5: Final Adjustments
Check all screws and connections to ensure they are tight and secure. Make any final adjustments to the shutters to ensure they open and close smoothly and fit snugly against the window frame. For pre-drilled screw holes, cap them off with the hole cover provided.
")


Step 6: Clean Up
Dispose of any packaging materials and clean your workspace. Enjoy your newly installed DIY Easyfit window shutters!


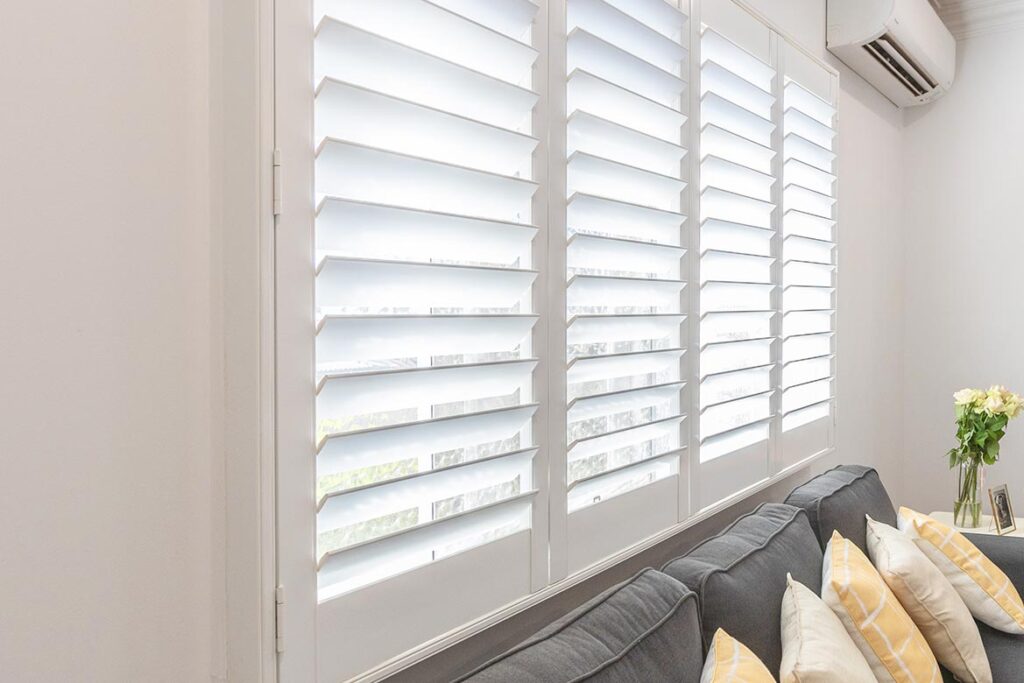
Transforming your living space with elegant plantation shutters has never been easier, thanks to DIY EasyFit Shutters™. With over 30 years of industry experience, our Booval, Queensland-based company is dedicated to providing affordable, high-quality window solutions that you can effortlessly order and install yourself.
Why Choose DIY EasyFit Shutters?
- Seamless Ordering Process: Our user-friendly online platform guides you through each step, offering detailed measuring guides and straightforward instructions to ensure accuracy and simplicity from start to finish.
- Uncompromised Quality: We pride ourselves on delivering plantation shutters that combine affordability with exceptional craftsmanship, enhancing the comfort and style of your home without breaking the bank.
- Expert Support: Our dedicated team meticulously reviews every aspect of your order to guarantee precision. We proactively reach out to address any questions or uncertainties, ensuring a seamless and satisfactory experience.
- Easy Installation: Say goodbye to complexity. Our comprehensive guidelines and instructions make installing your shutters a breeze, allowing you to enjoy your upgraded space in no time.
At DIY EasyFit Shutters™, we understand the importance of creating a cozy and stylish living environment. Our commitment to quality, attention to detail, and professionalism ensures that every shutter we supply meets your highest expectations.
Experience the difference of working with a trusted provider for all your plantation shutter needs. Visit our website to explore our offerings and take the first step toward transforming your home today.
DIY Plantation Shutters Brisbane
#diyeasyfitshutters
#plantationshuttersaustralia
#pvcshutters
#howtoinstalldiyshutters
#polyshutters
#botanynsw
#windowcoverings
#homeinspo
#homedecor
#diyshuttersqueensland
#howtoinstalldiyplantationshutters
#diyshutters
#easyas